Post is on how to use CG-Pro to program Jaguar Land rover KVM key perfectly in step by step procedure.
Part 1: Read out the data from smart computer and anti-theft computer.
Remove the smart computer and the IMMO box from the car.

BCM immo box

Image 2: Smart ECU RFA
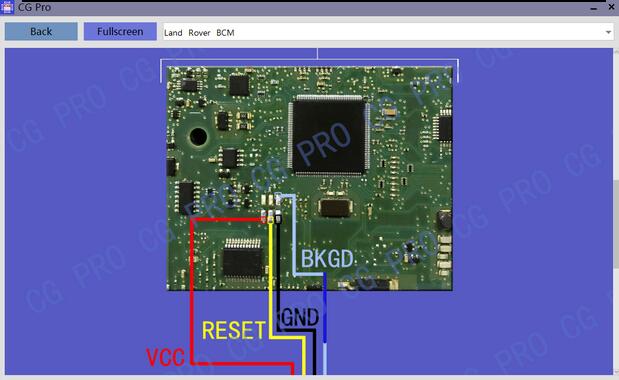
Wiring according to the wiring diagram in the software, click on “Diagram” to follow.

BCM wiring diagram in the CG Pro software.

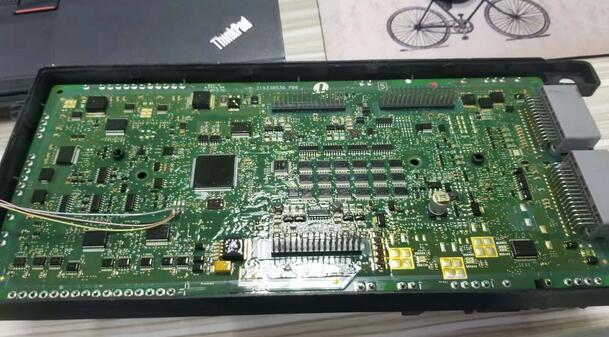
BCM physical wiring

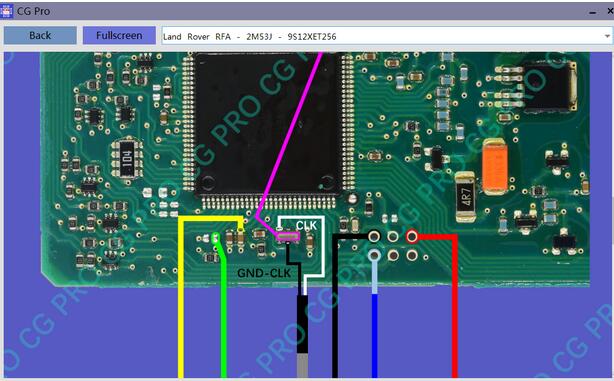
Land Rover RFA 2m53J 9S12XET256 wiring diagram in the CG Pro 9S12 software.

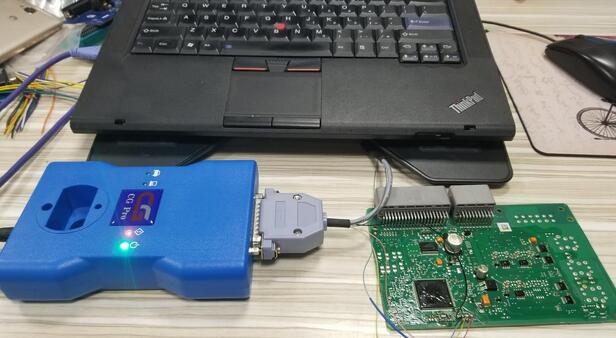
Land Rover RFA smart ECU physical wiring:
You need not connect the CLK line first, if you are prompted to decrypt when reading, then connect the CLK line according to the software wiring diagram.

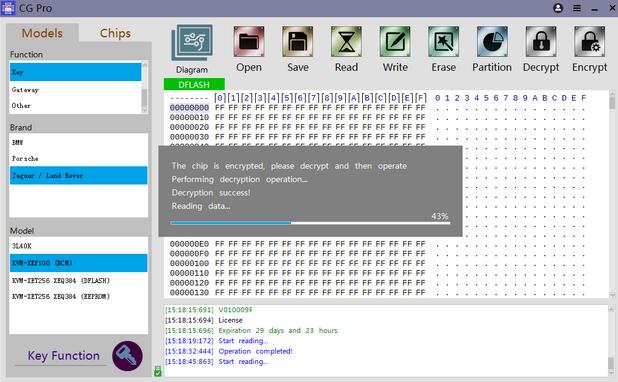
Choose BCM or RFA module, read and save the data.


Note: Do not unplug the wiring immediately after the data is read out successfully, later you will write key and then rewrite data.
Part 2: Load the data into CG Pro software to program key
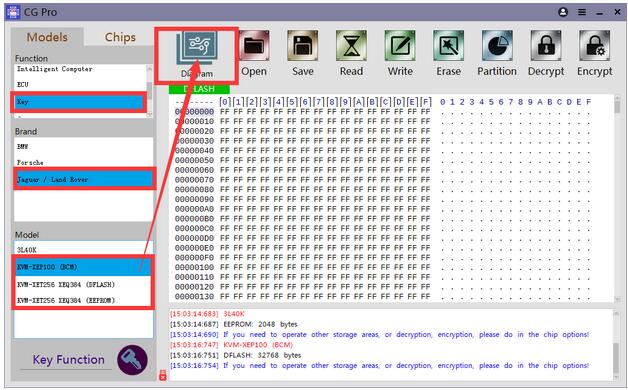
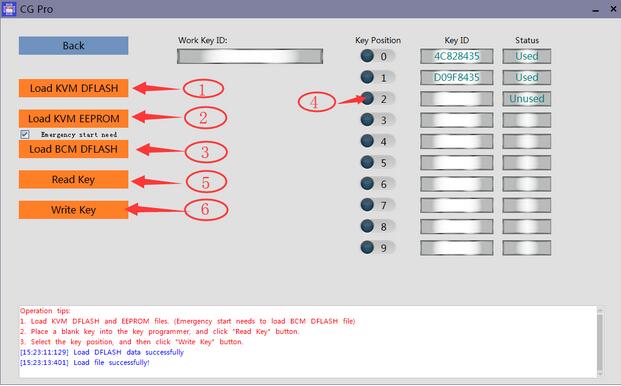
Click on “Key” – ” Jaguar / Land Rover” – Model [KVM – XEP100 (BCM) for example], then click on “Key Function” to enter the key programming menu incl. load KVM DFLASH, load KVM EEPROM, Load BCM DFLASH, Read key, Write key etc.

Menu options:
Step 1: Load KVM DFLASH
Step 2: Load KVM EEPROM
This function is for emergency start (optional option). If you need to operate this option, please read out BCM immo data and meanwhile tick on this option when key is programming, then load BCM data.
Step 3: Place a blank key into the CG Pro key programmer, click on “Read key” button.
***Can read key ID and check if the key is placed correctly.
Step 4: Select key position and then click on “Write key” button.


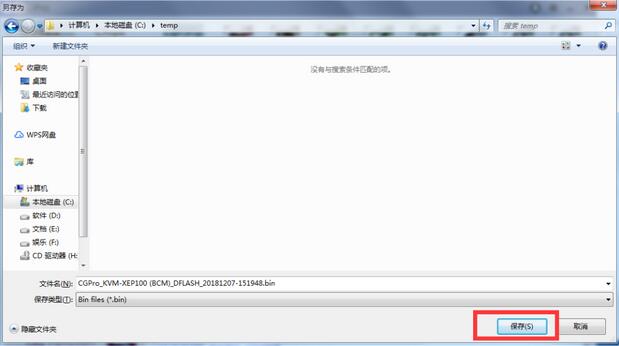
Please save the data in the order of DFLASH,EEPROM,BCM.
Part 3: Rewrite the data generated after key programming.
1.Back to the main menu where you read out the data just now.
2.Open the corresponding data saved after the key is wrote.
3.Write data after connecting the computer.
Done!
Now, you can unplug the cables from the computer and CG Pro, then reinstall the KVM module back to the car.And for more CGDI Key Programmer,you can check here:CGDI Programmer
Part 1: Read out the data from smart computer and anti-theft computer.
Remove the smart computer and the IMMO box from the car.
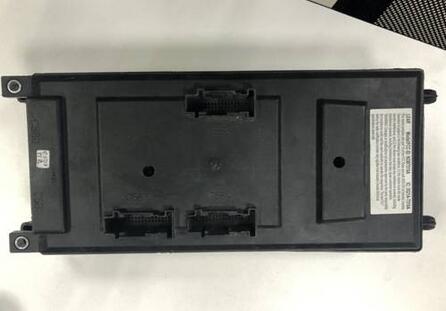
BCM immo box

Image 2: Smart ECU RFA
Wiring according to the wiring diagram in the software, click on “Diagram” to follow.
BCM wiring diagram in the CG Pro software.
BCM physical wiring
Land Rover RFA 2m53J 9S12XET256 wiring diagram in the CG Pro 9S12 software.
Land Rover RFA smart ECU physical wiring:
You need not connect the CLK line first, if you are prompted to decrypt when reading, then connect the CLK line according to the software wiring diagram.
Choose BCM or RFA module, read and save the data.
Note: Do not unplug the wiring immediately after the data is read out successfully, later you will write key and then rewrite data.
Part 2: Load the data into CG Pro software to program key
Click on “Key” – ” Jaguar / Land Rover” – Model [KVM – XEP100 (BCM) for example], then click on “Key Function” to enter the key programming menu incl. load KVM DFLASH, load KVM EEPROM, Load BCM DFLASH, Read key, Write key etc.

Menu options:
Step 1: Load KVM DFLASH
Step 2: Load KVM EEPROM
This function is for emergency start (optional option). If you need to operate this option, please read out BCM immo data and meanwhile tick on this option when key is programming, then load BCM data.
Step 3: Place a blank key into the CG Pro key programmer, click on “Read key” button.
***Can read key ID and check if the key is placed correctly.
Step 4: Select key position and then click on “Write key” button.
Please save the data in the order of DFLASH,EEPROM,BCM.
Part 3: Rewrite the data generated after key programming.
1.Back to the main menu where you read out the data just now.
2.Open the corresponding data saved after the key is wrote.
3.Write data after connecting the computer.
Done!
Now, you can unplug the cables from the computer and CG Pro, then reinstall the KVM module back to the car.And for more CGDI Key Programmer,you can check here:CGDI Programmer
Comments
Post a Comment