
Monitoring Data Engine menggunakan TECHSTREAM TIS Software v12.20.024

1.Please connect the MINI-VCI adapter to the OBDII Diagnostic Port in your Car.
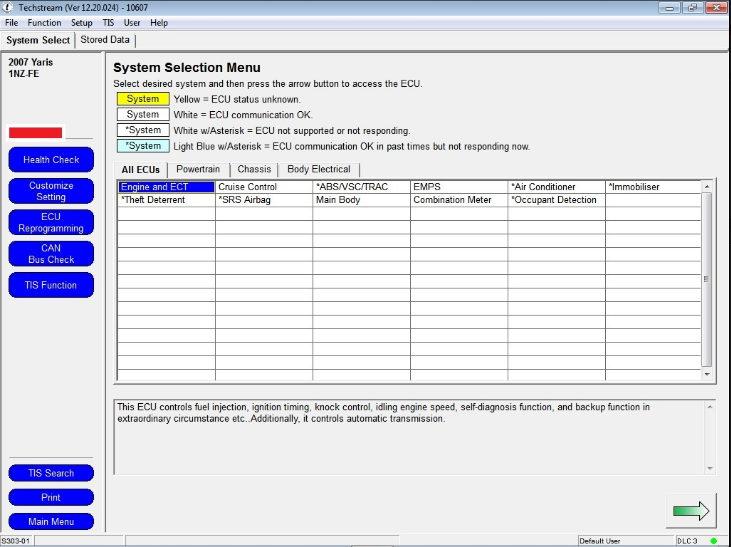
2.When it is connected, click “Engine and ECT” on the “System Selection Menu”.
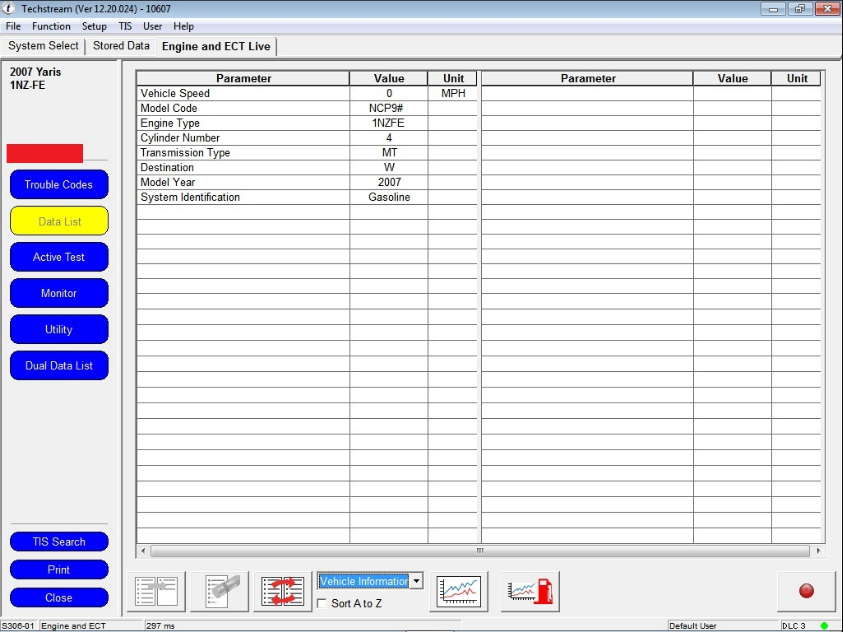
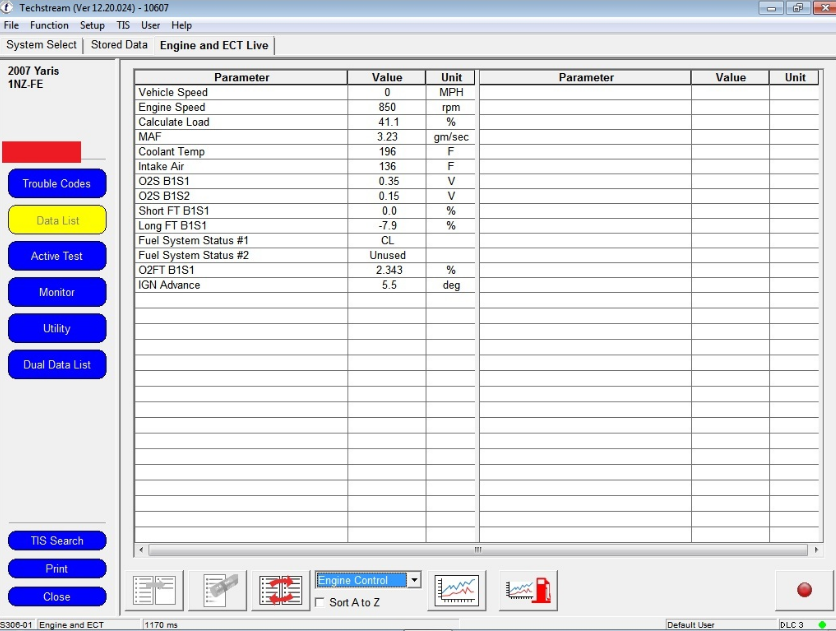
3.Click “Data List” on the left menu, and ECU Data will appear on the “Parameter List” as in Figure 1.1 above.
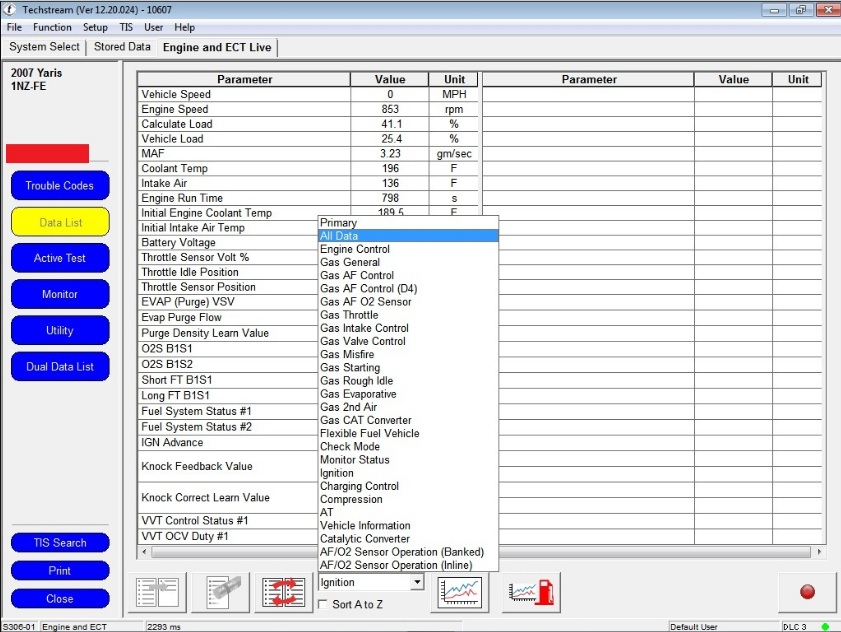
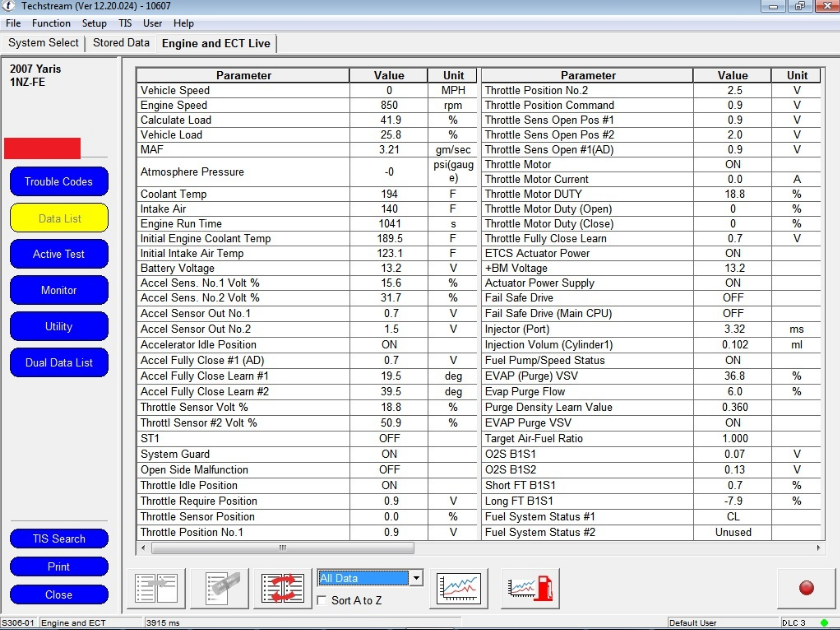
4.Please select “Parameter Group List” to display the desired parameter breakdown.
-New List Data: create / add a new Parameter Group.
-Remove Button: delete the selected parameter (selected row).
Data Manager Button: displays the list “Data List Manager”.
-Graph Button: add graphical display of “Data List Manager”.
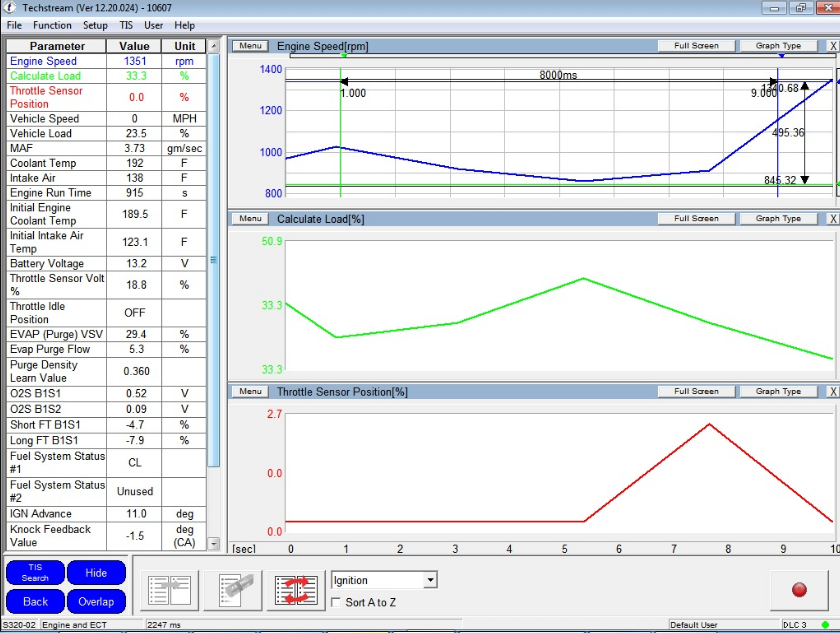
-Record Button: starts data list records.
Max.Recording Time: 30 seconds
-Fuel Consumption Button: displays the fuel usage function.
If you are interesting in buy Mini VCI for toyota, please check this link to get more information : https://www.obd2tool.com/goods-4749-MINI-VCI-FOR-TOYOTA-TIS-Techstream.html

Comments

Popular posts from this blog

How to Solve VW Amarok Caddy 2018+ Remote Not Working After Programming

Here comes the general problem of VW Amarok Caddy etc. 2018+ UDS protocol vehicles: 2019 VW Caddy. I spent a few hours programming the Xhorse key using VVDI2 . Also tried TDB1000. Remote function could not be obtained. Every time the programming failed, the original remote stopped working until I scanned and cleared errors. I expected it to work when the transponder was added (Megamos AES). I can’t access remote learning with any of my tools, nor did vvdi2 let me program the remote. I was wondering if anyone could confirm remote learning with transponders or how to learn it if not. Solution: It is not possible for BH remote controls after 2018 at the latest. You will not get any communication with the central locking remote control customization. You need a dealer key 100% and then learn from ODIS. There is no after-market solution, VAG blocked the remote channel on UDS vehicles 2018+. Had the exact same issues with new caddies. So merchant key and Odis ATM since the c...

John Deere Service Advisor 4.2 CF – Construction & Forestry incl. Hitachi + History DVD 2016

John Deere Service Advisor  4.2 CF – Construction & Forestry incl. Hitachi 2/2016 contains detailed information on all the procedures for repair and maintenance, a lot of illustrations, wiring diagrams, electrical and hydraulic circuits for construction and forestry equipment John Deere. Service Advisor contains information about setting up data, troubleshooting procedures, symptoms of malfunctions, the order of disassembly and assembly, adjustment data, torque. Electronic program is designed to handle all maintenance issues, eliminate breakdowns and malfunctions. Installation of this software is very easy and doesn’t require additional knowledge. The program allows you to quickly and easily find information and solve problems with machinery John Deere. This service advisor is designed to work with Windows XP, 7, 8. This software works under Windows 10 but wasn’t tested with EDL adapter and drivers. This version of Service Advisor has built-in hot...

How to use XTOOL X100 Pad3 to correct or adjust the mileage of Ford cars

This tech article will share the practical experience of using  Xtool X100 Pad3 to correct or adjust the mileage of Ford cars. The frequently-asked questions (FAQs) of the users who bought the products from the  OBD2TOOL will be listed as the supplement part for reference. We can’t even wait a second to move on with the content below… Detailed Operation Instructions: Let’s first have a look at the current mileage of my Ford car: It’s 68,679 miles now. Click “Diagnosis” on the desktop menu>>Click “Odometer adjustment”>>Click “Agree” to confirm the disclaimer Then, it’s time for us to choose the car models. Here, the car model is Ford Focus 2013. Then Click the button “Mileage adjustment”. The screen will prompt the message as shown below: Just press “Yes” to continue. The screen will show you “Please input the mileage of adjustment”. Just type in the mileage number you want to correct in the box below. Here, let’s adjust it to 90,000 km. Wait...