How to: Perform a Forced PDK Update via VXDIAG Multi diagnostic Piwis Tester II/Porsche Tester Piwis III.
Applicable Model/Year
* 2013-2016 Porsche 981 Cayman and Boxster (Base, S, GTS) w/ PDK Transmission
* 2012-2016 Porsche 911.1 NA Carrera (Base, S, GTS) w/ PDK Transmission
* 2014-2016 Porsche 911 Turbo and Turbo S w/ PDK Transmission
How To Enable
* This function must be performed by a Porsche PIWIS II tool. It will be possible with a Porsche Tester III but the workflow process may vary.
When And Why to Update
* A forced PDK update is required when a vehicle possesses the Q033 ROM and an open campaign update is not visible via the PIWIS tool. This procedure will update the PDK to a Q061 or newer ROM.
* This update is required to run the latest PDK OTS maps with custom features such as faster shift speeds, sequential shifter stalk, dual paddle to neutral, no kickdown, and no creep. These features would otherwise not be possible running the Q033 ROM.
Things To Look Out For
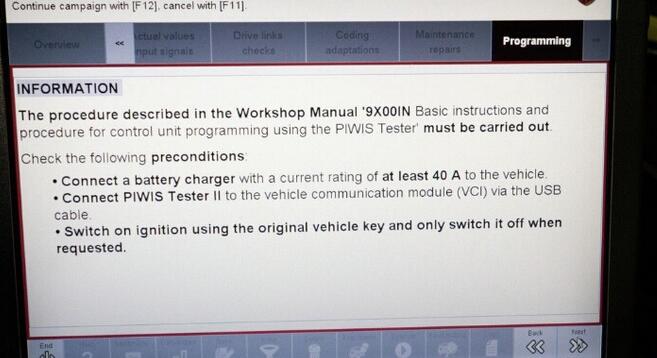
The update process does take some time (30 to 45 minutes), so it is important to have a battery charger (10A to 12A recommended, or a charger with a “flash” setting will work) on the car’s battery during this process. It would also be a good idea to keep a charger on the PIWIS II computer as well.
If you have a PIWIS III tool, the workflow procedure may slightly differ.
Steps to Use
NOTE: BEFORE PROCEEDING, ACCESSPORT MUST BE UNINSTALLED FROM VEHICLE.
* Connect a battery charger to the car’s battery, put the key in the “ON” position (engine off), and turn on the PIWIS2 tool. The PIWISII will need to be connected to the OBD II port at his point as well.
* At the main menu on the PIWIS-II, select DIAGNOSTICS >> 911 >>> 991. Your selection may vary if you have a Boxster/Cayman.


3. At this point, the PIWIS II will load up the software and prompt you to a new menu.


porsche-forced-pdf-vxdiag-piwis-5
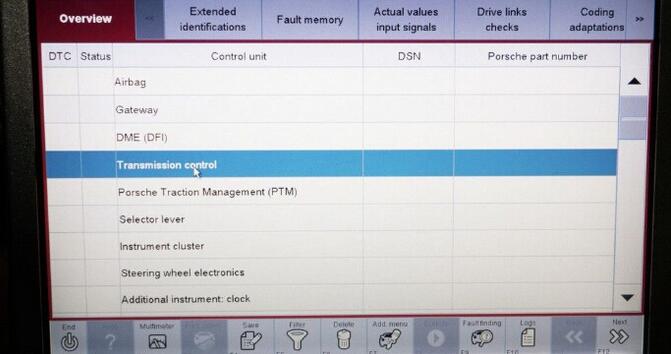
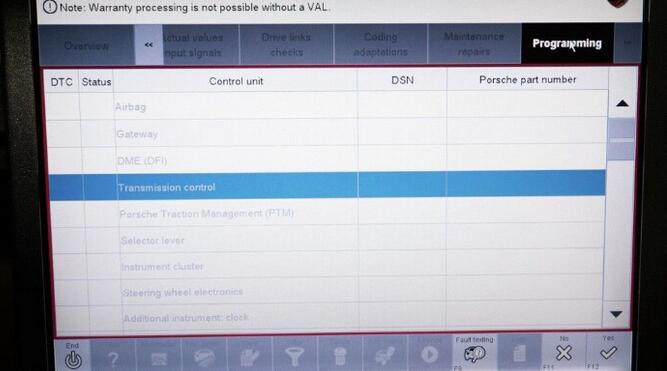
4. Select the “Transmission Control” unit control. After this is selected, scroll to the right on the top overview bar and select “Programming”.
You can now select “Automatic Programming” and hit the “Next” button on the bottom right of PIWIS II.


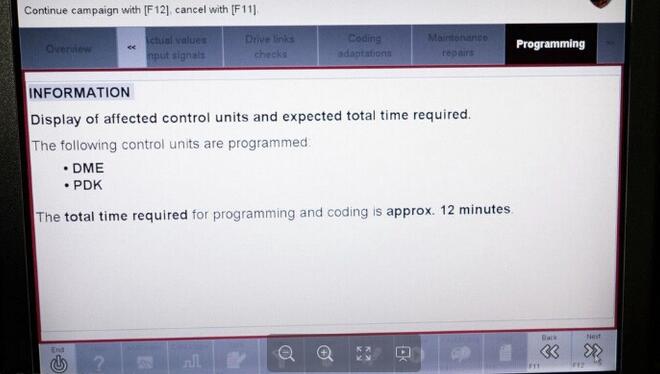
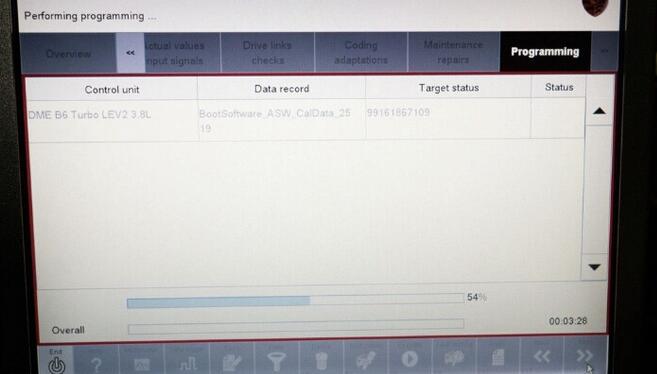
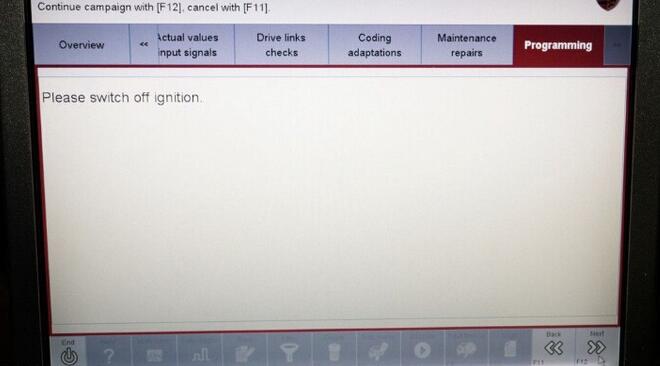
5. From here, Unit Documentation and the update will begin, several prompts regarding battery charger use and ignition on will appear. Continue to press the “Next” button on the bottom right to move forward with the process. You can keep an eye on the progress bar on the bottom and Steps listed at the top. Keep an eye on the VXDIAG Porsche Piwis for any ignition off sequences or need to press the “Next” button.


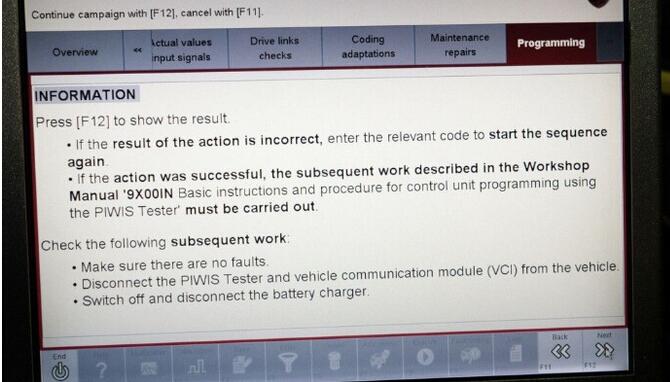
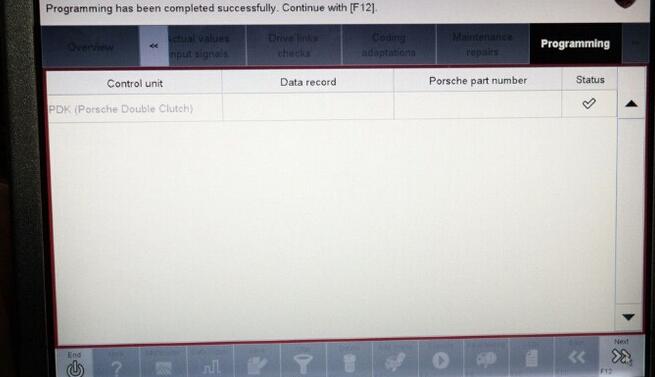
6. When you finish the final step, step 12, an information prompt will appear. Hit “Next” to be shown success programming.


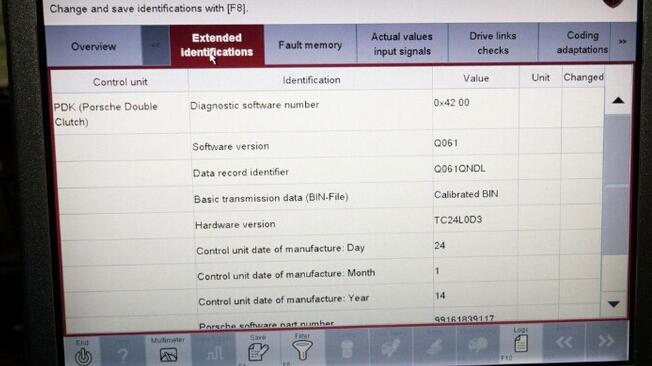
7.And that’s it, you’re done! This would be a good time to check for any transmission fault codes and clear them if they are present. You can confirm you are on the latest Q061 ROM by selecting the “Transmission Control” function on the main menu and selecting “Extended Identifications” on the top scroller bar.

Done.
Applicable Model/Year
* 2013-2016 Porsche 981 Cayman and Boxster (Base, S, GTS) w/ PDK Transmission
* 2012-2016 Porsche 911.1 NA Carrera (Base, S, GTS) w/ PDK Transmission
* 2014-2016 Porsche 911 Turbo and Turbo S w/ PDK Transmission
How To Enable
* This function must be performed by a Porsche PIWIS II tool. It will be possible with a Porsche Tester III but the workflow process may vary.
When And Why to Update
* A forced PDK update is required when a vehicle possesses the Q033 ROM and an open campaign update is not visible via the PIWIS tool. This procedure will update the PDK to a Q061 or newer ROM.
* This update is required to run the latest PDK OTS maps with custom features such as faster shift speeds, sequential shifter stalk, dual paddle to neutral, no kickdown, and no creep. These features would otherwise not be possible running the Q033 ROM.
Things To Look Out For
The update process does take some time (30 to 45 minutes), so it is important to have a battery charger (10A to 12A recommended, or a charger with a “flash” setting will work) on the car’s battery during this process. It would also be a good idea to keep a charger on the PIWIS II computer as well.
If you have a PIWIS III tool, the workflow procedure may slightly differ.
Steps to Use
NOTE: BEFORE PROCEEDING, ACCESSPORT MUST BE UNINSTALLED FROM VEHICLE.
* Connect a battery charger to the car’s battery, put the key in the “ON” position (engine off), and turn on the PIWIS2 tool. The PIWISII will need to be connected to the OBD II port at his point as well.
* At the main menu on the PIWIS-II, select DIAGNOSTICS >> 911 >>> 991. Your selection may vary if you have a Boxster/Cayman.


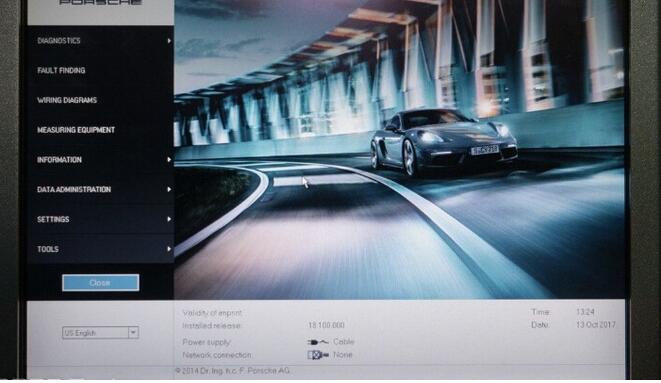
3. At this point, the PIWIS II will load up the software and prompt you to a new menu.

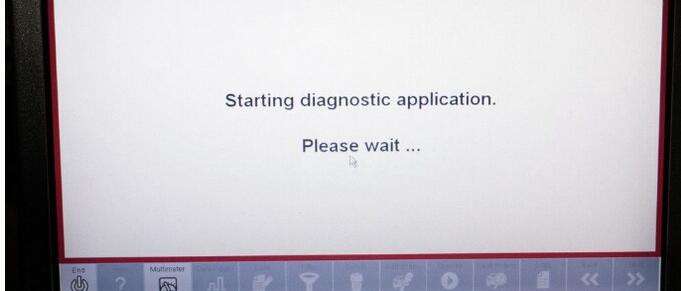
porsche-forced-pdf-vxdiag-piwis-5
4. Select the “Transmission Control” unit control. After this is selected, scroll to the right on the top overview bar and select “Programming”.
You can now select “Automatic Programming” and hit the “Next” button on the bottom right of PIWIS II.


5. From here, Unit Documentation and the update will begin, several prompts regarding battery charger use and ignition on will appear. Continue to press the “Next” button on the bottom right to move forward with the process. You can keep an eye on the progress bar on the bottom and Steps listed at the top. Keep an eye on the VXDIAG Porsche Piwis for any ignition off sequences or need to press the “Next” button.

6. When you finish the final step, step 12, an information prompt will appear. Hit “Next” to be shown success programming.
7.And that’s it, you’re done! This would be a good time to check for any transmission fault codes and clear them if they are present. You can confirm you are on the latest Q061 ROM by selecting the “Transmission Control” function on the main menu and selecting “Extended Identifications” on the top scroller bar.
Done.
Comments
Post a Comment