
How to Install and Use the CANDI Interface on a GM Tech2 Scanner


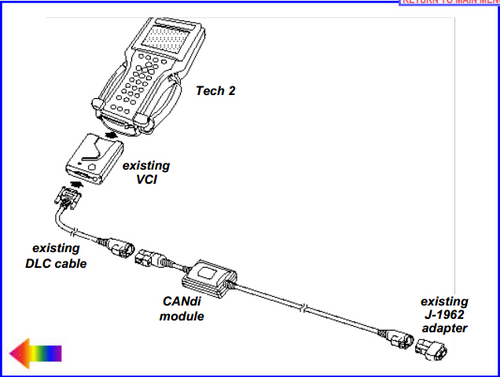
The GM Tech II comes with GM software and provides support for on-board diagnostics on all GM systems 1992 thru 2010.The CANDI module for GM tech2 connects between the GM Tech 2 Flash’s diagnostic link cable and the OBD adapter. Once the CANDI module is connected, it can be used on all GM vehicle applications, even those vehicles using other platforms such as OBD I and OBD II.

The CANdi (Controller Area Network Diagnostic Interface) is an in-line cable module that works with existing Tech 2 components including the VCI, cables and adapters.

CANdi module is fully compatible with current and past Tech 2 software. The module powers up in a way that makes it transparent to the user. This allows the existing Tech 2 software to be used with no changes when the CANdi module is installed. If a vehicle requires the use of a CANdi module, the Tech 2 clone will enable features specific to the module.

Supports simultaneous communications on three CAN buses

Provides high-speed UART communications with the GM Tech2

A self test will help to check well Candi module is well connected or not. Here is the step-by-step instruction on how to do Teh2 candi interface self test.

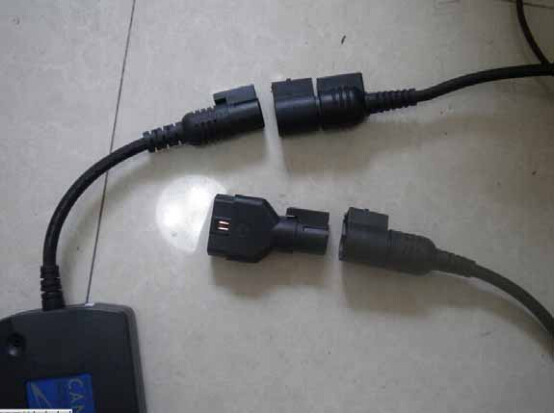
1) Connect CANdi interface to the vehicle via 12 PIN ALDL connector

2) Run and complete all GM tech 2 scanner stand-alone self-test. Disconnect CANdi interface when run Tech2 scan tool self test.

3) Run VCI self test. If the VCI self-test fails, replace VCI module. Disconnect CANdi module when run VCI self test

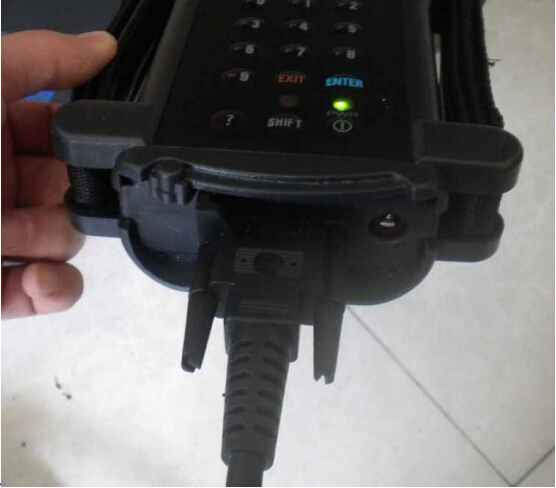
4) Connect the CANdi module to an existing VCI module via DLC cable, and connect VCI module with vehicle. Make sure there is good connection between scanner and vehicle. Verify that the LED on the CANdi module is flashing.

How-to-Install-and-Use-the-CANDI-Interface-on-a-GM-Tech2-1
How-to-Install-and-Use-the-CANDI-Interface-on-a-GM-Tech2-2
How-to-Install-and-Use-the-CANDI-Interface-on-a-GM-Tech2-3
How-to-Install-and-Use-the-CANDI-Interface-on-a-GM-Tech2-4

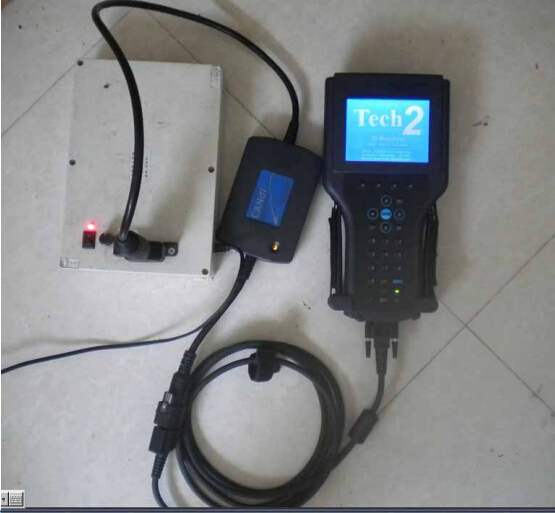
5) After well connected with vehicle and Tech2 main unit, power up the GM Tech2 scan tool, the scanner is flashing. Software update procedure will display on the screen.

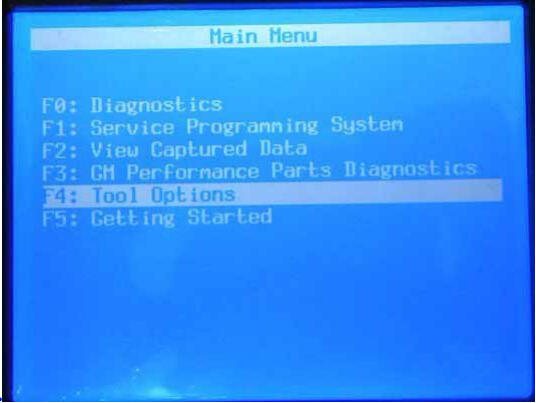
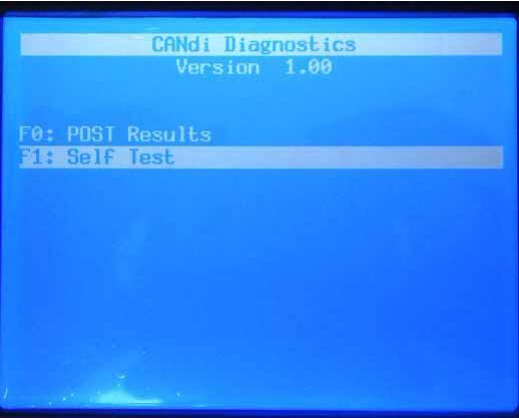
6) Browse to “Tool Options” menu, select “F9 CANdi Diagnostics” option

How-to-Install-and-Use-the-CANDI-Interface-on-a-GM-Tech2-5
How-to-Install-and-Use-the-CANDI-Interface-on-a-GM-Tech2-6

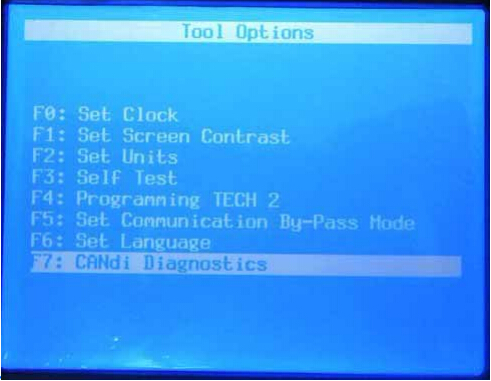
7) Two options available under CANdi Diagnostics menu: POST Test and Self Test

How-to-Install-and-Use-the-CANDI-Interface-on-a-GM-Tech2-7

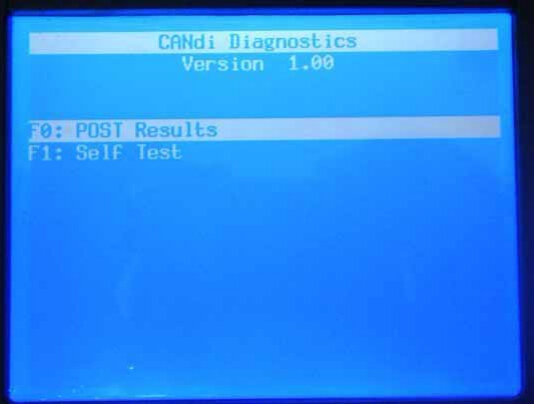
8) First run a POST Test. The CANdi POST result is used to determine if the module has any problems during the software upgrade or start-up sequence.

How-to-Install-and-Use-the-CANDI-Interface-on-a-GM-Tech2-8

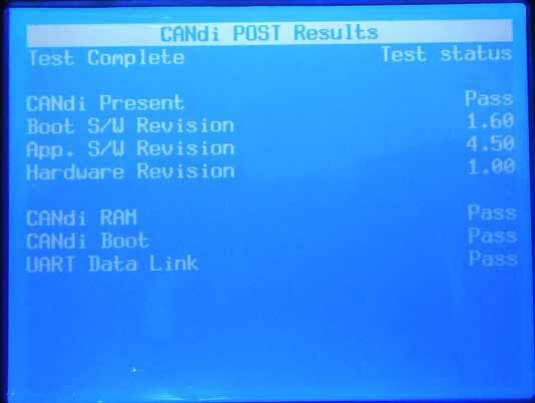
9) Then run Self Test, here is the CANdi Self Test Results figure
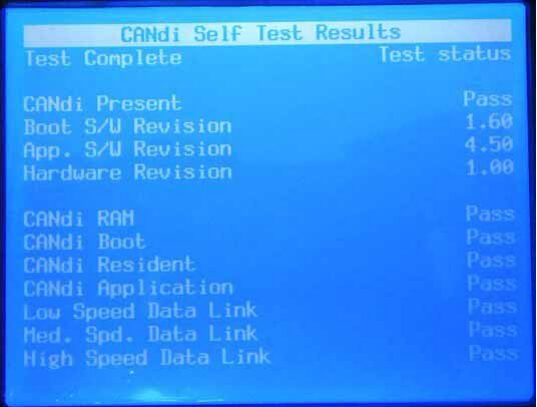
How-to-Install-and-Use-the-CANDI-Interface-on-a-GM-Tech2-9
How-to-Install-and-Use-the-CANDI-Interface-on-a-GM-Tech2-10

NOTE:

If the CANdi module is connected and an error screen occurs, disconnect the CANdi module from the Tech 2 and perform the test again.

Candi interface support GM vehicle list:
05 Buick Allure (3.6L)
05 Buick LaCrosse (3.6L)
05 Buick Rainier (5.3L)
04-05 Buick Rendezvous (3.6L)
04-05 Cadillac CTS (3.6L)
04-05 Cadillac SRX (3.6L / 4.6L)
04-05 Cadillac XLR (4.6L)
05 Cadillac STS (3.6L / 4.6L)
05 Chevrolet Cobalt (2.2L)
05 Chevrolet Corvette (6.0L)
05 Chevrolet Equinox (3.4L)
05 Chevrolet TrailBlazer (5.3L)
05 Chevrolet SSR (6.0L)
04 Chevrolet Malibu (Body/Chassis only)
05 Chevrolet Malibu (3.5L)
05 GMC Envoy (5.3L)
05 Pontiac G6 (3.5L)
05 Pontiac GTO (6.0L)
05 Pontiac Pursuit (2.2L)
03-05 Saturn ION (2.2L)

Feedback from customer:
GM tech2 would NOT work with All C5’s, if you’re going to use it on a C6, make SURE you have the CANDi modules.

I purchase a used CANDi module so I can use it on my C6.

Comments

Popular posts from this blog

VAG OBD Helper Software

VAG OBD helper 4th Immo Data Calculator free download source and installation guide. VAG OBD helper free download source: https://mega.nz/#!gZJzTKTC!BTVJqa-SmWgrwbd-n0vV8r2glx23d3l2OpN3ZRu1gXU Download the above link on the desktop. Decompress it. Install the driver firstly, then use the USB port to connect the device. Open the software, you will see the serial number read by the cable, the language is Chinese and English. There are some pdf files in Chinese on how to use VAG OBD helper to read out the 4th IMMO data and then use the key programmer to program key. VAG OBD helper Token: Each time the user read out the IMMO data, it will cost one token. Usually the VAG OBD helper comes with one free token FROM www.obd2tool.com , after it use up, just send the supplier serial number to charge more.

Solved BMW ISTA error IFH-0010, Vehicle could not be identified

This blog list 3 kinds of  bmw diagnostic scanner ISTA errors and solutions you may need. ISTA NCS error IFH-0010+ solution ISTA error”MSVCP120.dll is missing”+ solution ISTA error “The vehicle could not be identified”+ solution Note: All error solutions here are suitable for  BMW ICOM A2 and BMW ICOM Next ! ISTA error IFH-0010: DATATRANSMISSION TO CONTROLUNIT DISTURBED ISTA error: A communication fault occurred during activation Incorrect state: ERROR ECU CONDITIONS NOT CORRECT OR REQUEST SEQUENCE ERROR Solution: Try setting COM port latency to 1 in Advanced Settings for the port. You should change it to 1 to have the least lag/disturbances between data transfer. BMW ISTA System error “MSVCP120.dll is missing” The program can’t start because MSVCP120.dll is missing from your computer. Solution: Reinstall VC++ Redistributables and try again. If you’re running x64, you will need both x86 and x64 bit versions installed. Feedback: I got rid o...

How to Install Mercedes Benz DTS Monaco 8.16 Software

  This instruction show you the guide on how to install Mercedes Benz DTS Monaco Software . Preparations: Benz DTS Monaco Software Free Download After finish downoading and extract you will get below files Double click DTS-Setup to start installation Then just click default option to continue Click Finish Copy files in the repalce folder to DTS Monaco installation folder replace C:\Program Files(x86)\Softing\Diagnostic Tool Set 8\8.16\bin Then run “DTS Monacon” icon on desktop,it will show you the HWID and ask you to activate Please sent me your HWID to me(sales@obd2tool.com),we will sent you a activate file and license file When you get the xxx.reg file,doulbe click it to register it to your pc,click yes to add it the registy Run DTS Monaco and select “Administrate and manage DTS projects’ Select “System”–>”Add license” Load the License_0000000000000.bin file i sent you before Now your DTS Monaco have activated successfully! DTS Monaco 8.03.12 Softw...